2-Factor authentication, also known as two-step verification, 2FA and multi-factor authentication (MFA), adds an additional safeguard to your email account security by requiring a one-time password in addition to your email address & password for logging into your email account.
2-Factor authentication also allows setting up trusted devices such as mobile phones or mail clients to authenticate with a one-time password for devices that do not natively support 2-Factor Authentication (see Additional Steps below).
***Before you setup 2FA, best practices are to request that we disable the security feature that automatically locks mailboxes for an hour after 10 bad passwords. Please open a ticket, and request disabling the automatic lock for any mailboxes for which you plan to enable 2FA. Please do not begin to setup 2FA until you receive confirmation that we've disabled that security feature for you.
To setup 2-Factor authentication in your zMailCloud account, login to your webmail account (usually https://yourdomainname.zmailcloud.com/)
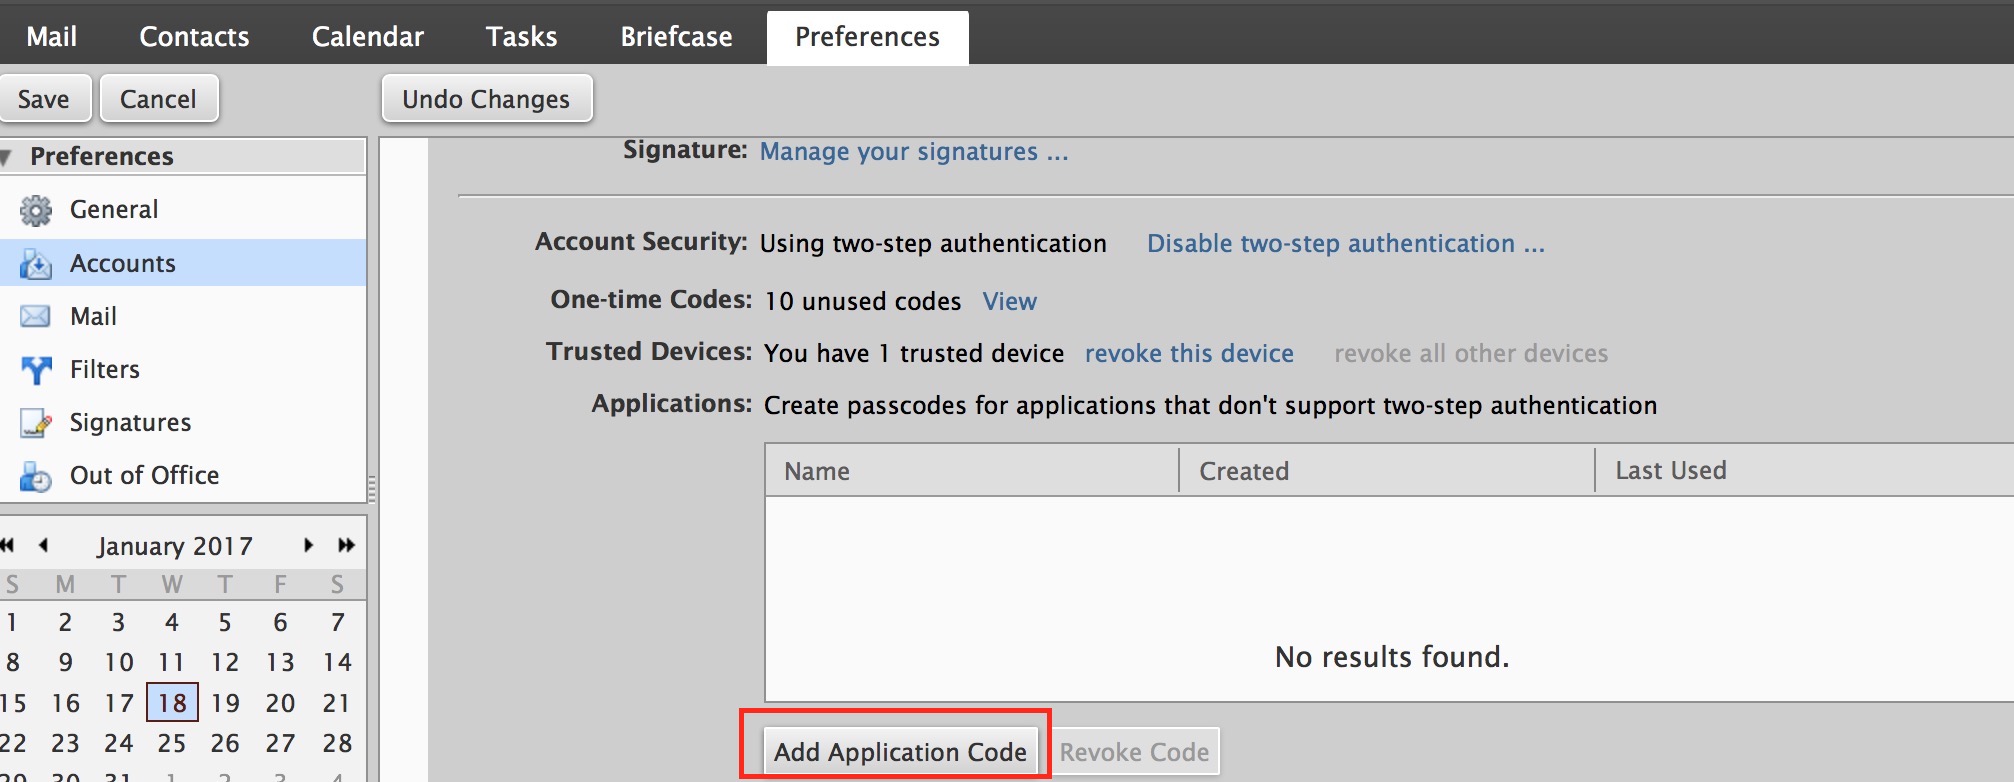
Once logged in go to Preferences > Accounts. Under Account Security click on Setup two-step authentication...:
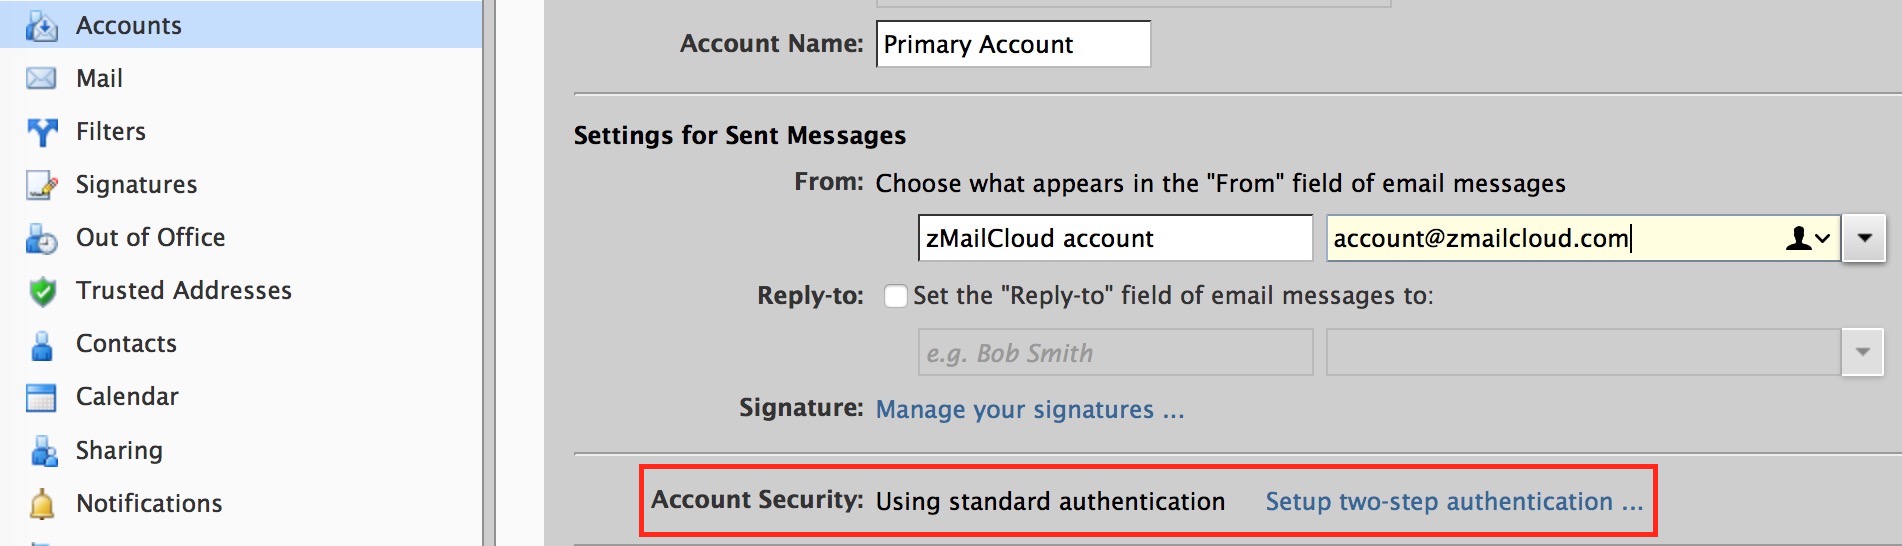
If you do not see this option, please submit a ticket and let us know.
Before you begin:
Note that once 2 factor authentication is enabled, you will need to remove and setup any devices (including mobile devices) you are currently syncing to using an Application passcode (see Authenticating with Applications below) or your 2-factor authentication code.
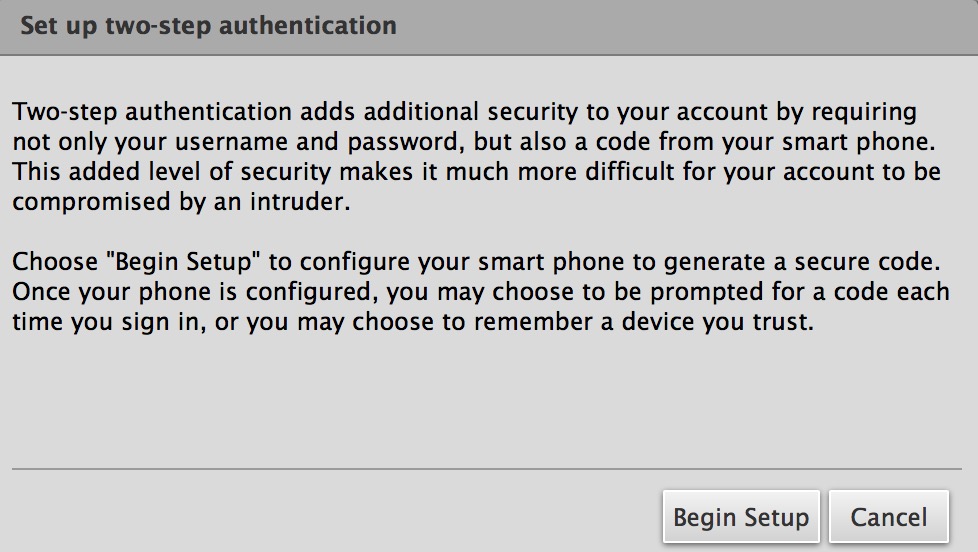
To start, select Begin Setup:
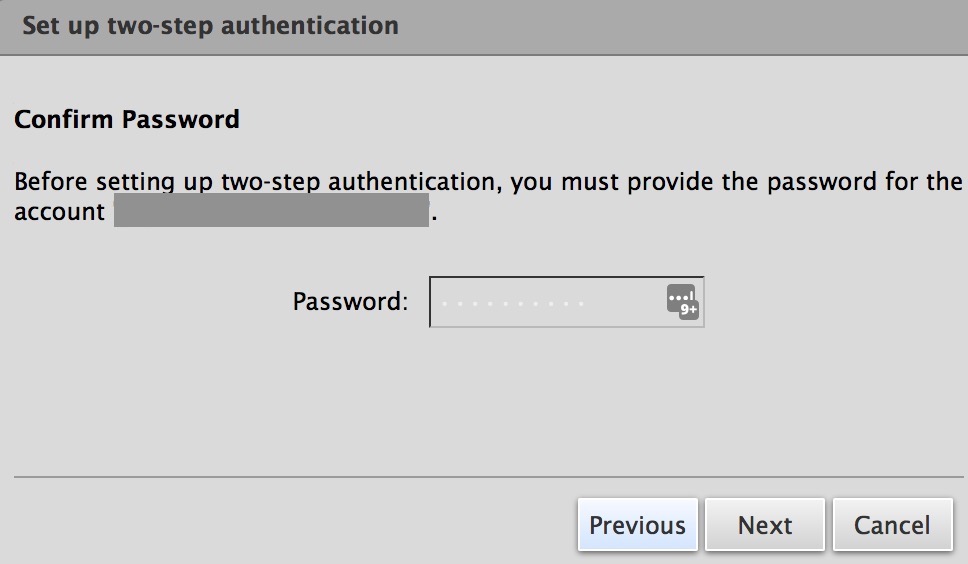
Enter the password for your account to continue and click Next:
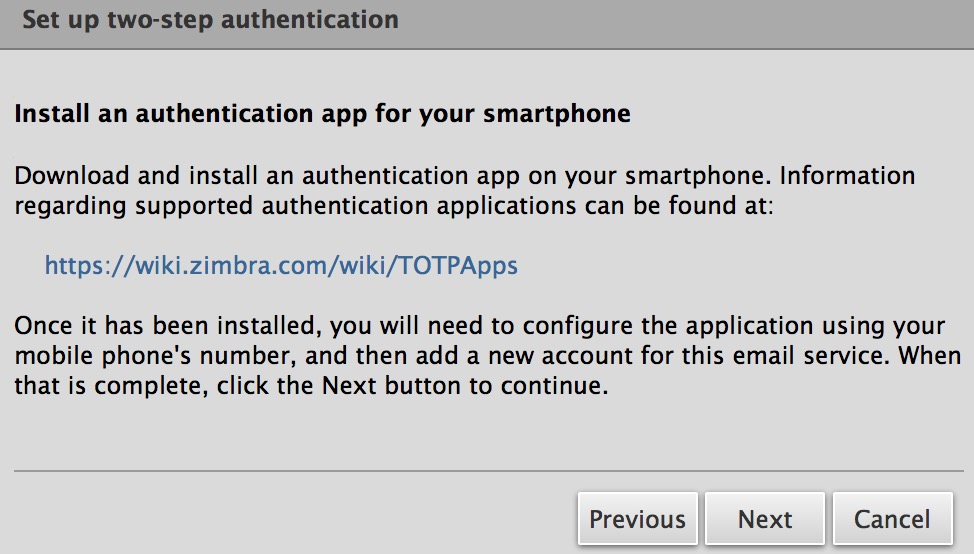
Next, install a one-time password application on your smartphone or tablet. For a list of supported apps, please see: https://wiki.zimbra.com/wiki/TOTPApps Click Next once installed:
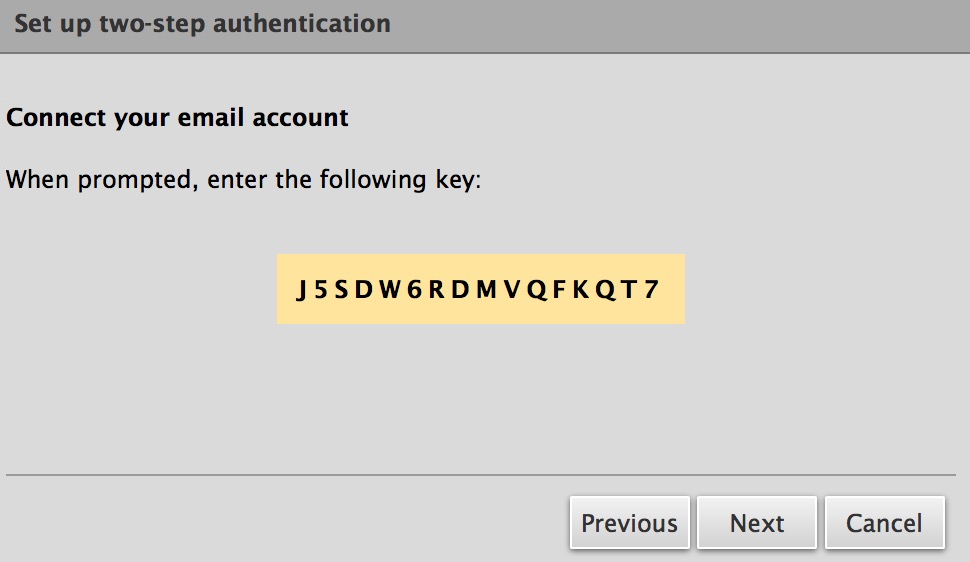
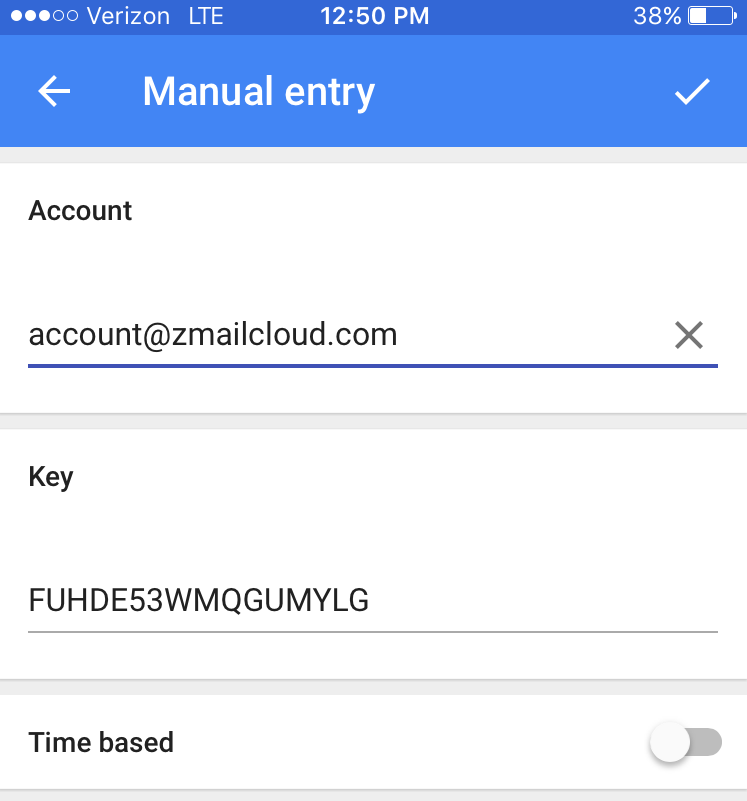
On your smartphone or tablet, add your email address & authentication key to your authentication app (select Manual Entry):
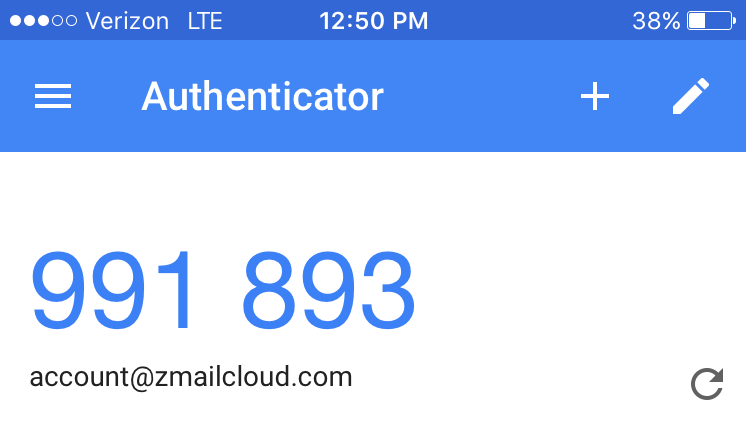
Once added, you will see your account with your one-time use codes. Use these codes for signing into your account using 2-step authentication when prompted:
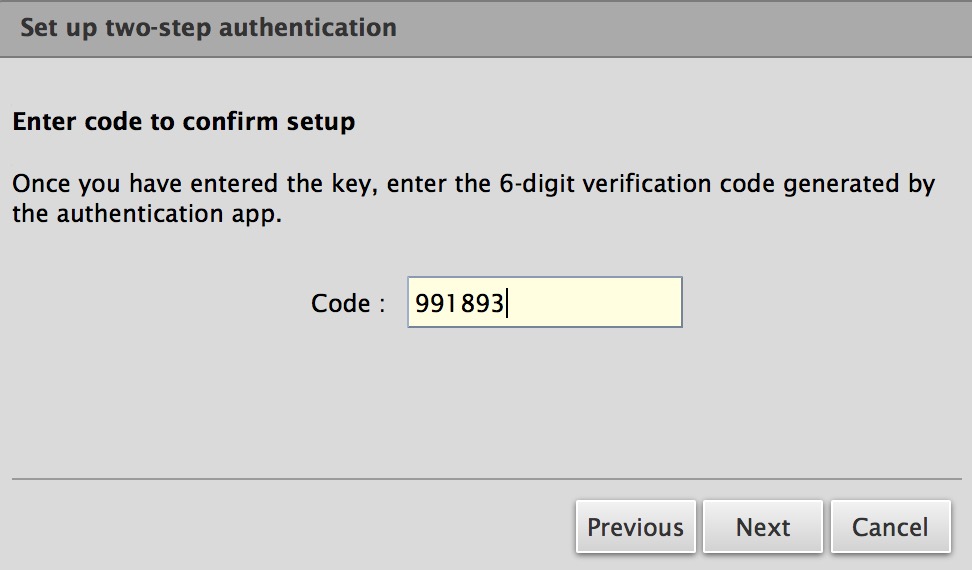
In your zMailCloud account, enter your two-step authentication key to proceed:
You should see a Success! message indicating that 2-step/2-factor authentication is setup and ready to use:
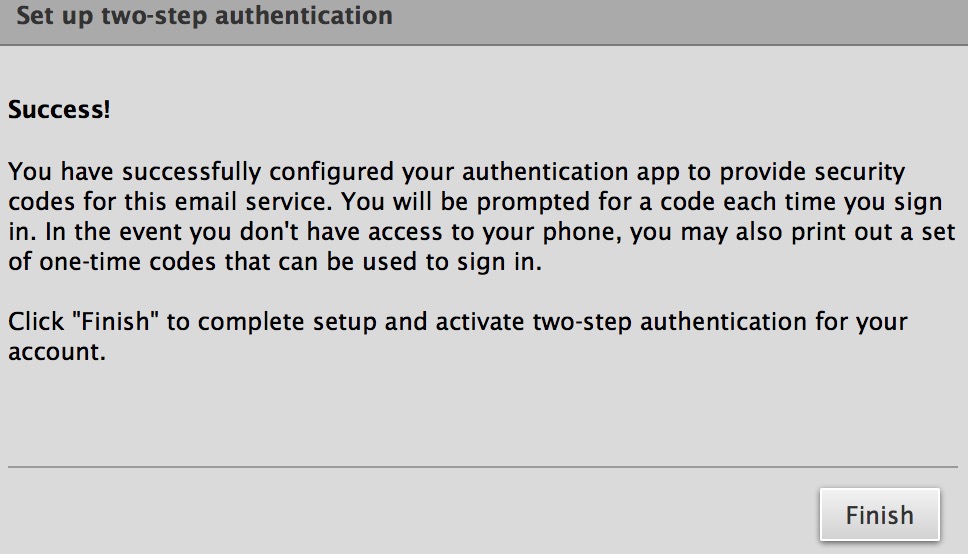
Note that 2-step authentication does not replace your email address & password, it is an additional authentication step. With 2-step authentication enabled on your account, you will be prompted to enter your one-time password each time you sign-in to your account:

Additional Steps: Authenticating with Applications
You can also create passcodes for devices that do not support 2-Factor Authentication. Most mobile phones and mail clients will require setting up individual passcodes for these devices when 2-step authentication is enabled. The below steps will show you how to do this:
Go to Preferences > Accounts > Application Codes > Add Application Code in your webmail account to begin.
This will generate an application passcode:
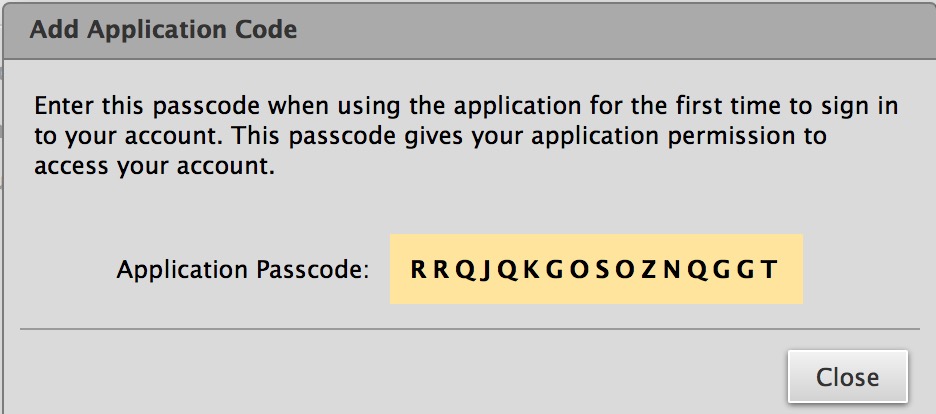
Use this application passcode when setting up your account on your device as your normal password.
Once authenticated, you will see your device listed under Application Passcodes:
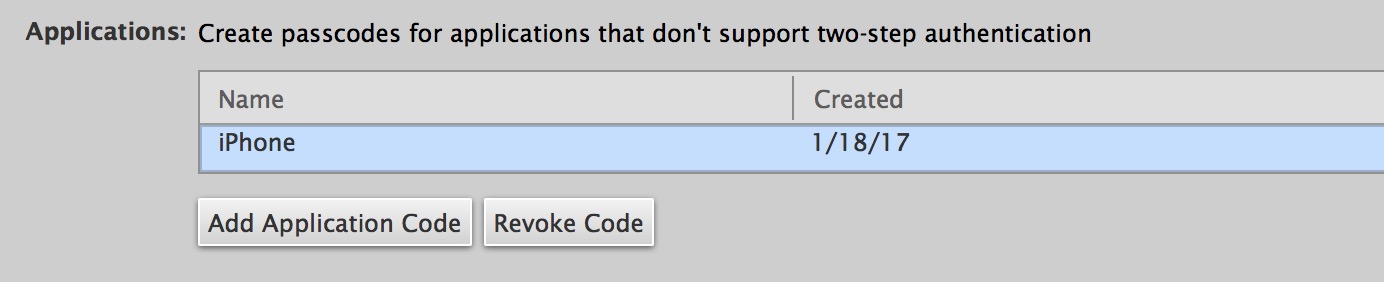
NOTE: best practices are to setup a unique name and application code for each of your applications. This way, if you lose access to one, you only have to delete and re-add that single application code.
Congratulations! You have successfully setup 2-factor authentication for your account. If you need further assistance, please submit a ticket.
