Using filters (aka "rules") in webmail
Webmail filters enable you to automate your email organization. You may use filters to program rules the server will follow based on conditions you set, for instance, anytime you see inbound mail to your sales mailbox alias (e.g.: sales@yourdomain.com), move the message to your Sales email folder, which might already be shared with your sales team, and send a notification to your sales team distribution list.
What makes these filters particularly powerful is that they may be applied to both inbound and outbound messages, and may be applied to existing messages. So, you could for instance, apply a rule retroactively to all the messages in your inbox. This can make organizing your inbox much, much easier.
Rules you set that help you manage spam, may also sometimes be used as the basis for programming the advanced anti-spam and virus system (ASAV). If you have some rules you've proven effective over a month or more that you'd like applied to ASAV, please open a ticket identifying them, and we'll research whether or not that's practical. We normally provide this service free-of-additional charge.
Filters may also be combined with Personas, so that when you receive mail for sales (using the example above), its not only filed automatically, but also when you respond to the message, your sales@yourdomain.com persona is already selected by default, along with a reply-to of sales@yourdomain.com instead of your primary email name (e.g.: yourname@yourdomain.com).
If you're using the Zimbra Connector for Outlook (ZCO) to sync Outlook with your email, calendars and contacts on the server, we recommend establishing filters in the web client, not within Outlook, so that email gets filtered on the server, so it's filtered even when Outlook isn't connected (even when your computer with Outlook isn't on).
Note: Best practices in managing email folders include minimizing the number of folders used.
**Also note: do not use the "discard" action. Messages you discard, accidentally or otherwise, are entirely unrecoverable, unless you are using our optional KeepSafe archiving service. Instead move messages to your Trash, or Junk.
*** Final note: if you're looking for the Remail Filter example, please scroll to the bottom of this kbase article.
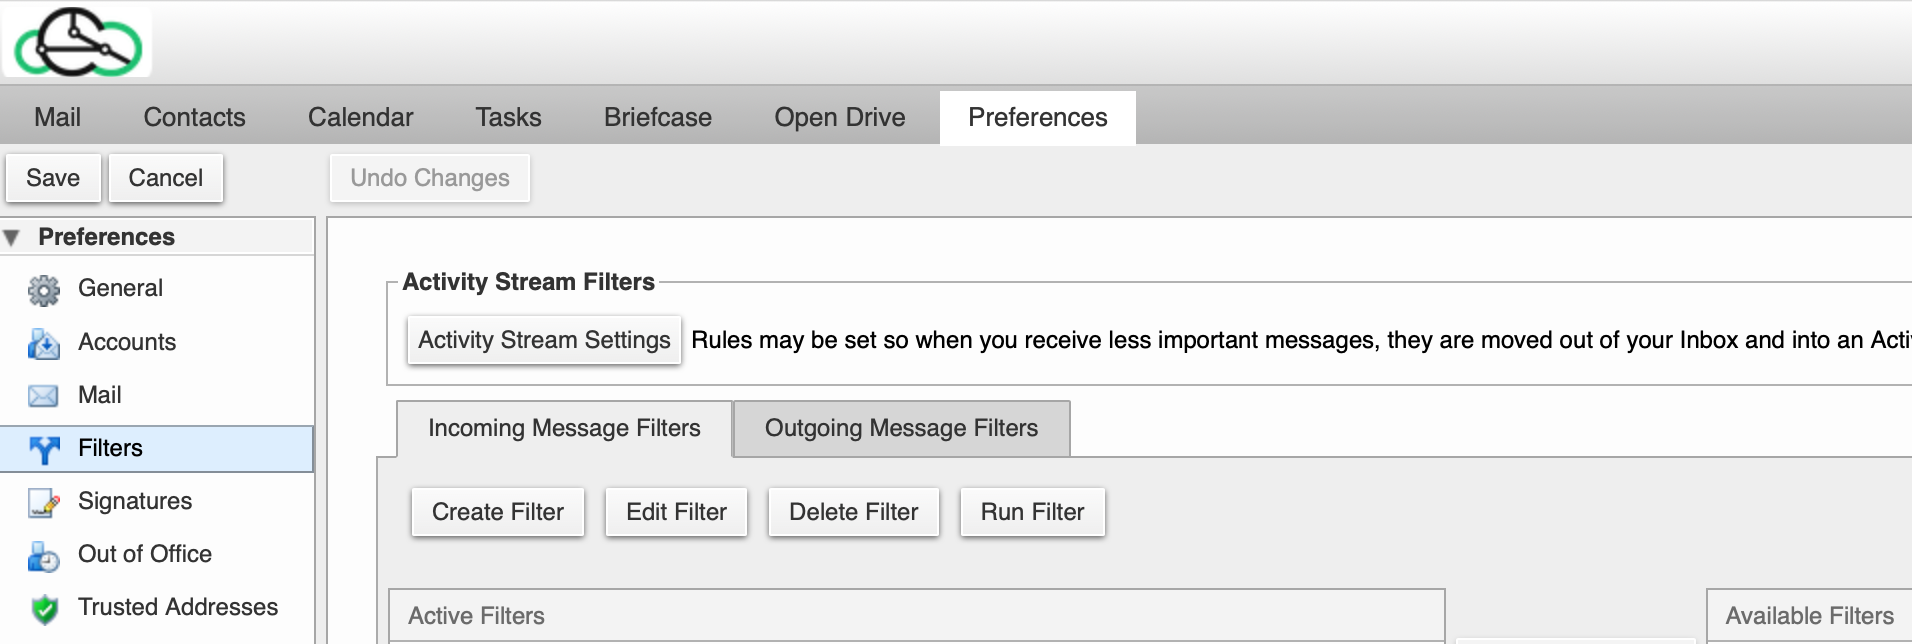
Find your filters in your webmail tab Preferences > Filters

Options review


Create New Filter
-
Select
→ Settings.
-
Click Filters in the left pane.
-
Click Add to create a new filter.
-
Set a Filter Name.
-
There are two filter editors — Basic and Advanced. By default, when creating a new filter Basic editor opens.
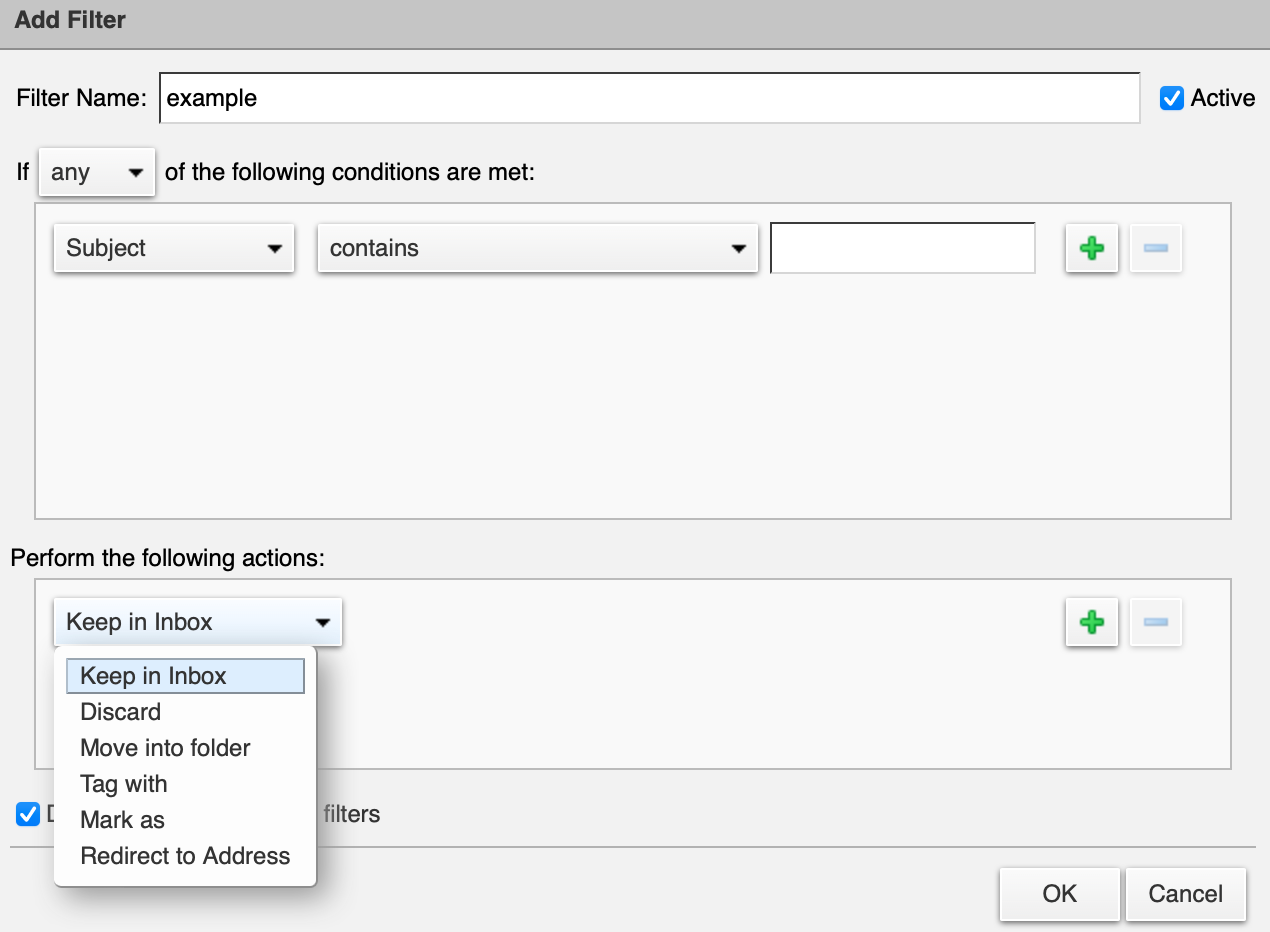
The Cloudiance Webmail client takes these actions when it encounters mails that meet the defined criteria.
- Move to folder
-
You can move the filtered email to either Junk or Trash
- Mark as read
-
Leave the message in the inbox but mark it as read.
- Permanently delete
-
Discard the email, so it does not appear in the Trash folder.
- Forward to
-
Redirect the email to another email address.
- Star
-
Flag the email so that it stands out and appears with a star in the email list.
- Tag With
-
Mark an email with tags that you have created. For more information see our kbase on Advanced Search.
Basic
In the basic editor, you can specify only one action to affect emails that meet the filter criteria. E.g., you can only mark it read or move it to trash; you can’t do both. To perform multiple actions on emails matching specific criteria, check advanced mode.
-
Choose if the incoming mails have to meet any one or all of the defined criteria.
-
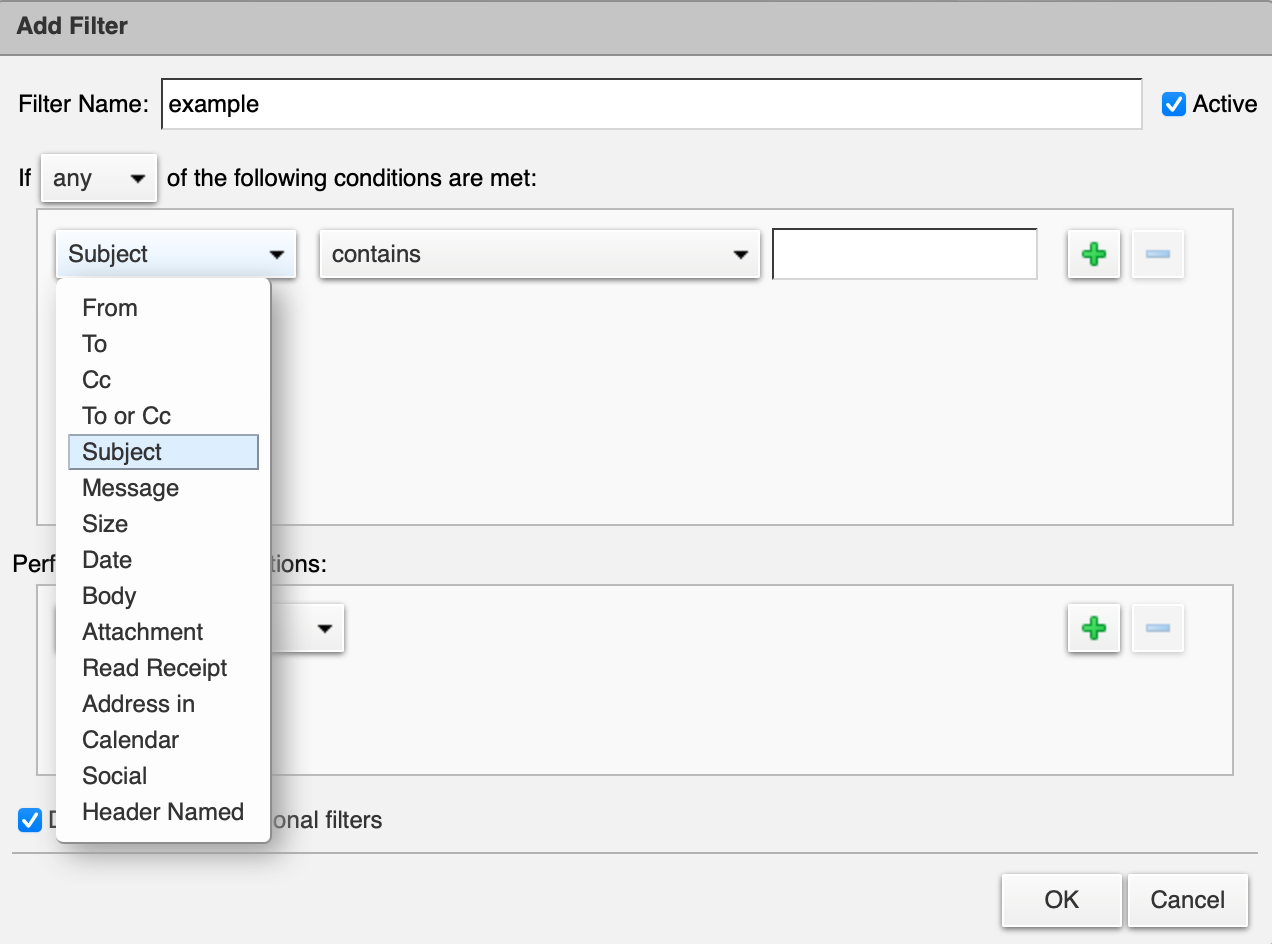
Define the conditions that an email has to meet for the defined action to take effect.
-
Under Then choose what happens with the filtered email. You can choose only one action.
Advanced
In the advanced editor, you can specify multiple actions to affect emails that meet the filter criteria. E.g., you can mark it read and move it to trash.
-
Click Switch to advanced.
-
Choose if the incoming mails have to meet any one or all of the defined criteria.
-
Define the conditions that an email has to meet for the defined action to take effect.
-
To add more conditions, click + Add a condition.
-
-
Under Then choose what happens with the filtered email. You can choose only one action.
-
To add more actions click + Add an action
-
| And do not process additional filters check-box stops other filters from running on a message which meets the criteria for multiple filters. |
Managing Filters
-
Select
→ Settings.
-
Click Filters in the left pane.
-
The right pane lists all the filters that you have created so far.
-
Click and drag
to raise or lower the filter priority.
-
Check or uncheck a filter to enable or disable it.
-
Click
against a filter to bring up options like Details, Run, Edit, and Delete.
- Details
-
Lists the conditions for an email to meet and the action to take when an email meets the filter criteria.
- Run
-
Choose an account and then folder(s) on which to run the filter.
- Edit
-
Opens the appropriate editor — Basic or Advanced — to edit a filter.
- Delete
-
Prompts a confirmation dialog before deleting a filter.
-
Remail Filter
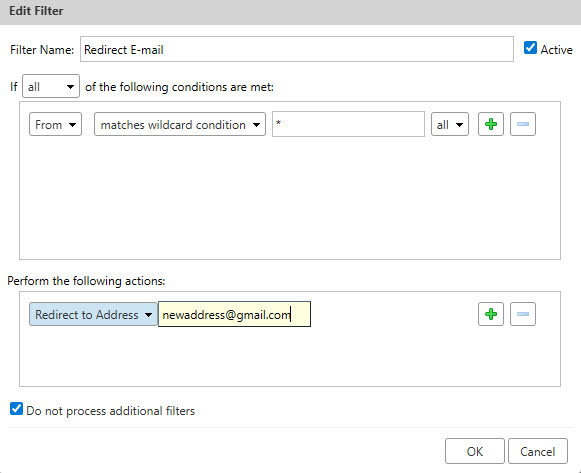
The best way to automatically "re-mail" messages is to use the web filter rules to "Redirect to an address."
To re-mail an address, using the rules, you can use redirect to an email address.
If you want to re-mail all messages that come into your mailbox, you can use the From Condition matches wildcard condition *.
Then in the Perform the following actions, choose Redirect, and put in the e-mail address to which you want your messages re-mailed.
Please see the graphic below for an example.

